The purpose of this document is to provide step-by-step guidance for frequently asked PowerSchool questions. To view questions and answers, just click on one of the below topics.
Please refer to this document first before contacting the Data and Policy team. We will continue to update and add to the FAQs as questions arise throughout the school year.
Table of Contents:
Q: How can I conduct basic searches in PowerSchool?
Simple Search
You can search the database by entering a Search command in on the PowerSchool Start Page. A Search command must include three elements: a field name, a comparator, and a search argument. Click here for a list of comparators and how to use them.
Compound Search
You can search the database using multiple search commands simultaneously, this is called a compound search.
- Step 1: Enter a Search command, that includes a field name, comparator and search argument
- Step 2: Add a semicolon (;) and add the second Search command.
The below table includes useful search examples for your reference.
| Search Query | Enter in Search Field on Start Page | The Search produces |
| Students with no schedule | *number_of_classes=0 | Shows you all the students who are NOT enrolled in classes |
| Students with October birthdays in 2007 | *birthday>09/30/2007;*birthday<11/01/2007 | Shows you all the students whose birthdays are after Sept 30, but before Nov 1 in 2007 |
| Students in 3rd and 4th Grade | Grade_level in 3, 4 | Shows you all students in both grade levels 3 and 4 |
| Students who entered in the district in November 2015 | /entrydate>10/31/2015;entrydate<12/01/2015 | Shows you all students, BOTH active and inactive whose entry date is after 10/31/15 and before 12/01/15 |
| Active students who entered in November 2015 | Entry date>10/31/15;entrydate<12/01/15 | Shows you active students whose entry date is after 10/31/2015 and before12/01/2015 |
Q: How can I see the students who transferred in and/or out of my school during the school year?
You can find students who transferred in/out of your school in two different ways: You can use a standard Entry/Exit Report or do your own search. Use the “do your own search” method if you have specific dates for student transfers and you want to limit the results to students who transferred within that timeframe.
Running a standard Entry/Exit Report:
- Step 1: Log onto PowerSchool
- Step 2: Go to the Start Page
- Step 3: Click on NPS Reports in the left panel
- Step 4: Scroll down to Reports on the main screen and select the Entry/Exit Report
- Step 5: In the Entry/Exit Report:
- Select the student status you are looking from the dropdown: Enrolled, Exit or Enrolled or Exited
- Enter the enrollment or exit date by selecting the month from the dropdown and KEEP the current school year
- Select the Entry Code from the dropdown
- Select the Exit Code from the dropdown
- Step 6: Click Submit and you will see the full report with student data, exit or entry code, comment, date entered, date exited, current school and current status
- Step 7: To print the report click on File and Print. Alternatively, you can open an Excel sheet and copy and paste the report.
Do your own search: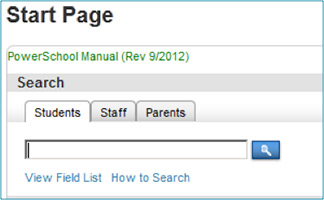
- Step 1: Log onto PowerSchool
- Step 2: Go to the Start Page
- Step 3: Enter the specific date, in the Search field
- For a specific entry or exit date type in Entrydate = or Exitdate = and enter the date (mm/dd/yyyy) (example: Entrydate=01/31/2016)
- For date range for Entry dates or Exit dates type in Entrydate or Exitdate>date 1 (mm/dd/yyyy); Entrydate or Exitdate<date 2 (mm/dd/yyyy); (example: To see students who entered your school between 2/1 and 3/23 type in: “Entrydate>2/1/2016;Entrydate<3/23/2016”)
- Step 5: Press enter on your keyboard OR click on the search button (magnifying glass) and a list of students will appear that match the criteria entered in the search field
- Step 6: Select a function for the group of students
- Step 7: Select List Students and enter the fields of information for the report
- Step 8: Click Submit
- Step 9: Open an Excel Sheet, and copy and paste the report for easy manipulation and distribution
Q. What is the difference between District Entry Date and School Entry Date in PowerSchool?
The District Entry Date and School Entry Date definitions are below.
District Entry Date
- This date represents the first date of attendance for the students (as opposed to registration date). In the case of students who entered, left, and re-entered the district, this date represents the most recent entry date into the district. This means that the District Entry Date = School Entry Date for students coming from a charter school into your school.
- This is not necessarily the first day of school each school year for every student. Students with continuous enrollment in your school or NPS schools maintain the same District Entry Date.
- Preschool students being referred for special services should have their date of referral as the District Entry Date. This is for students that have their first enrollment in PowerSchool in the Early Intervention School.
School Entry Date
- The date represents the first date of attendance for the student (as opposed to registration date). In the case of students who entered, left, and re-entered the district, this date represents the most recent entry date into the district. This means that the District Entry Date = School Entry Date for students coming from a charter school into your school.
- This is not necessarily the first day of school each school year for every student. School Entry Date does not reset at the first day of each new school year; it remains the same date as long as the student remains Active within your school.
- Preschool students being referred for special services should have their date of referral as the District Entry Date. This is for students that have their first enrollment in PowerSchool in the Early Intervention School.
Q: How can I remove attendance for previous days to transfer a student to another school?
- Step 1: Log onto PowerSchool
- Step 2: Go to the Start Page
- Step 3: Search for student by entering his/her name in the Search field
- Step 4: Click on Attendance in the left panel and select Meeting on the main screen
- Step 5: Click on Change Meeting Attendance
- Step 6: Enter the dates in the fields labeled “From this date” and “To this date” to remove attendance
- Step 7: Select ALL for Meetings ALL for Codes under scan
- Step 8: Click on Present to set the attendance code
- Step 9: Click Submit
Q: How do I drop students from one class and move them to another?
For Middle and High school Students
- Remove the student from the first class
- Step 1: Log onto PowerSchool
- Step 2: Go to the Start Page
- Step 3: Enter the student’s name in the Search field
- Step 4: Select Modify Schedule under the student name
- Step 5: Check the box next to the course that is being dropped and select Drop Selected
- Step 6: Enter the Exit (drop) Date (mm/dd/yyyy)
Note: the date must be after the class start date
- Enroll the student in another class:
- Step 1: Enter the student’s name in the Search field
- Step 2: Select Modify Schedule from the left panel
- Step 3: Enter a date under Effective Enroll date (mm/dd/yyyy)
- Step 4: Search for the class by entering the Course Number or the Period and click on FIND
- Step 5: Click on Course Name (this is a blue hyperlink). Once you click on this link you will see the student enrolled in this class.
For Elementary Students
- Step 1: Select the correct Homeroom course from the left panel
- Step 2: Click on SEC #, the second column in the table, this will take you to “edit section page”
- Step 3: Scroll down to the Dependent Sections field and verify it is populated the new HomeRoom.
- Step 4: Follow the above process steps for drop and enrollment. Select HomeRoom after you select the student to drop and then enroll in a new class.
Q: How can I ensure that a student has all his/her grades in the new grade book?
- Step 1: Log onto PowerSchool
- Step 2: Go to the Start Page
- Step 3: Click on NPS Reports
- Step 4: Under Grades
- Step 5: Click on Missing Gradebook Grades
- Step 6: To find any missing grades select the marking cycle (Q1-Q4), mid term exam (E1), final exam (E2) or final grade (F1) from the Store Code drop down under Report
- Step 7: Enter today’s date as drop date in the Exit Date field(mm/dd/yyyy), and today’s date in the Entry Date field (mm/dd/yyyy)
- Step 8: Select All Students
- Step 9: Click Submit and you will see the full report with teacher, course, student name, grade, and percentile
- Step 10: Open an Excel Sheet, and copy and paste the report for easy manipulation and distribution
Q: How do I ensure grades for an elementary student are complete when he or she transfers to another class?
Note: Do the following if you are at the beginning of the marking cycle or at the end of the marking cycle
- Step 1: Get any completed cycle (s) final grade(s) from the transferring teacher
- Step 2: Enter the final grade(s) in your Gradebook for the appropriate cycle(s)
- Step 3: View the current Gradebook to verify all marking cycles are complete for the student.
Q: How can I look at grade distributions?
- Step 1: Log onto PowerSchool
- Step 2: Go to the Start Page
- Step 3: Select on System Reports from the left panel
- Step 4: Scroll down to Grades and Gradebooks and select Grades Distribution
- Step 5: Select relevant action from the drop down under Data
- Step 6: Under Distribution Display type in ALL grades you want to see separated by commas
- Step 7: Click Submit and you will see the report under Report Queue. Once the report is complete click on View.
- Step 8: Open an Excel Sheet, and copy and paste the report for easy manipulation and distribution
Q: How to run class rosters.
- Step 1: Log onto PowerSchool
- Step 2: Go to the Start Page
- Step 3: Click on System Reports in left panel
- Step 4: Scroll down to Student Listings and then click on Class Rosters
- Step 5: Select teachers from the list (to choose multiple teachers hold down the CTRL key)
- Step 6: Select the meeting period and days
- Step 7: Include “currently enrolled students”
- Step 8: Copy and paste the fields from the below box into the Heading box
| ~(SchoolName) Class Roster as of ~(No_of_students) ~(teachername) Room: ~(Room) Course: ~(coursename) ~(Course_Number).~(Section_Number) |
- Step 9: Copy and paste the fields from the below box in the Roster Column box
| ~(count)\#\.2\c Student_Number\ID\.5\C last_name\last_name\.7\l first_name\first_name\.7\l Grade_Level\Grd\.3\C Gender\M/F\.3\C ethnicity\ethnicity\.4/c Special_Education\Clsf\.4\C ELL\LEP.4\C ~(Age;short)\Age\.7\C \Comments\1.0\C |
- Step 10: Click Submit and you will see the report under Report Queue. Once the report is complete click on View.
- Step 11: To print the report click on File and Print.