The district has adopted Cisco Webex as the standard solution for Video Conferencing and as an added component to the district's other remote learning platforms including Google Classroom.
Webex Tutorials
Logging onto the Webex Portal
-
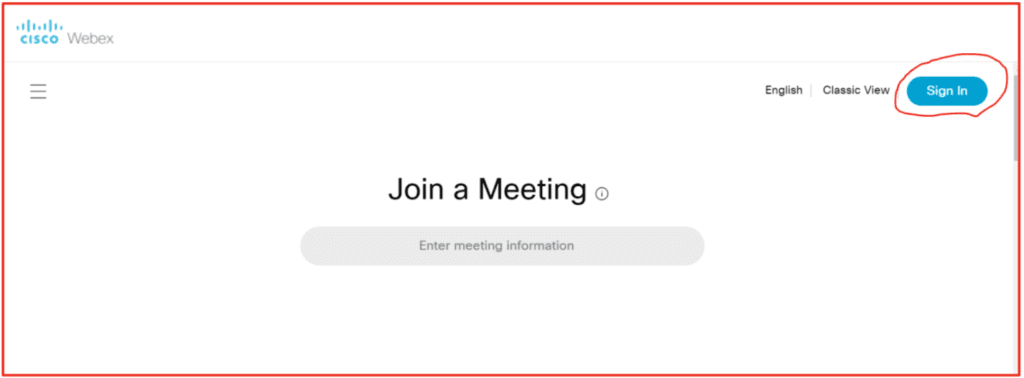
Open a browser and type in the following link: https://nboe.webex.com
-
Click the blue Sign In button.
-
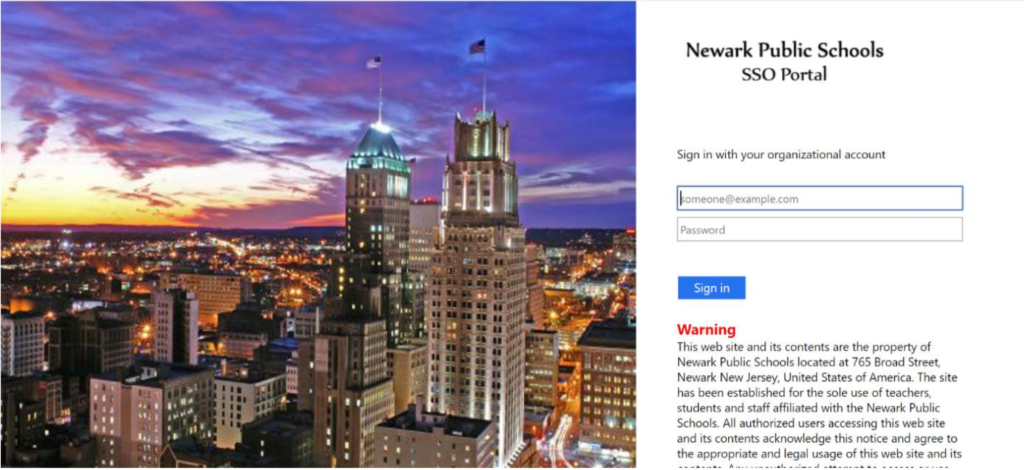
Type in your district assigned email address and click the blue Next button.

- Login into the district's SSO Portal with your district's user name and password.
- Once you login successfully, you will land on the district's WebEx Portal page as shown below.

Joining A District Webex Meeting
-
Log into the district WebEx Portal as shown in the previous section. Follow the school's or teacher's instructions on where to go to get the meeting access link or meeting code and password (e.g. Google Classroom).
-
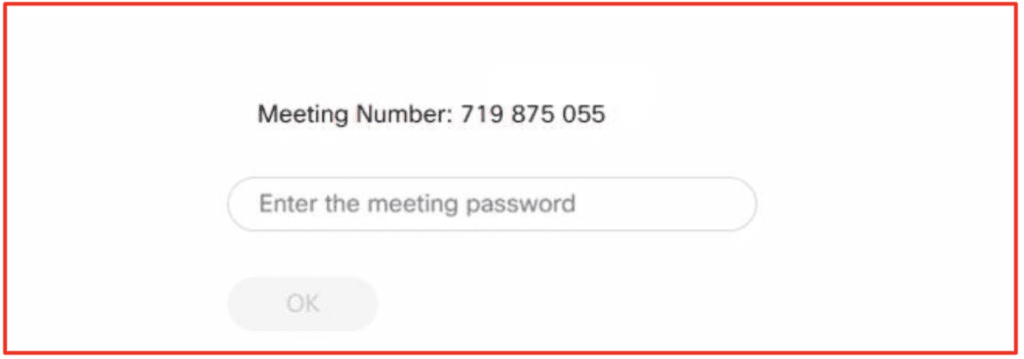
If provided with a meeting code and password, enter the meeting code in the district's WebEx Portal page by copying the meeting code and pasting it in the "Search for meetings and recordings" search box.

-
Select the listed meeting and, when prompted, copy the meeting password and paste the meeting password in the "Enter the meeting password text box. Click the blue OK button. The meeting will now start.
-
If provided with a meeting link, click the link or copy and paste the link in your browser URL bar. The meeting will now start.
-
Before joining the meeting, make sure to change the audio option from "Call me" to "Using computer for audio." The Join meeting button will turn green. Click the green “Join Meeting” button to Join the meeting.

-
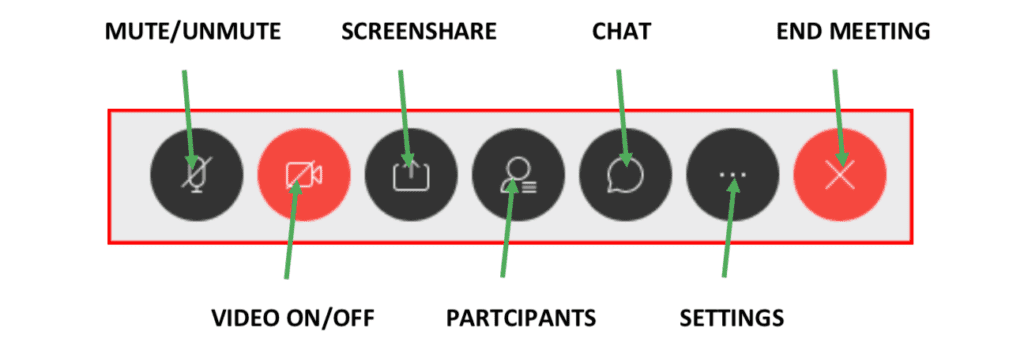
The following option and tools are available during the meeting.
Setting Meeting Preferences on the District’s Webex Portal
(ONE TIME Setup)
The next step is to set your preferences in the platform. This is a ONE TIME activity that will need to be done after you login for the first time. If you have already logged on before, you can go back and set your preferences as well. The objective it to follow the district’s standards so the portal can be better managed.
-
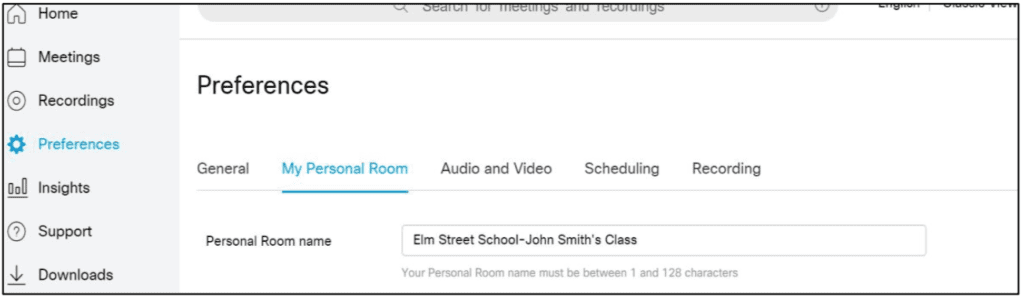
Click on the “Preferences” menu item. Select “My Personal Room” tab. Your Personal Room is equivalent to your Virtual Classroom. Under “Personal Room name” enter SchoolName followed by your full name as in Elm St. School-John Smith. Click the blue SAVE button.
-
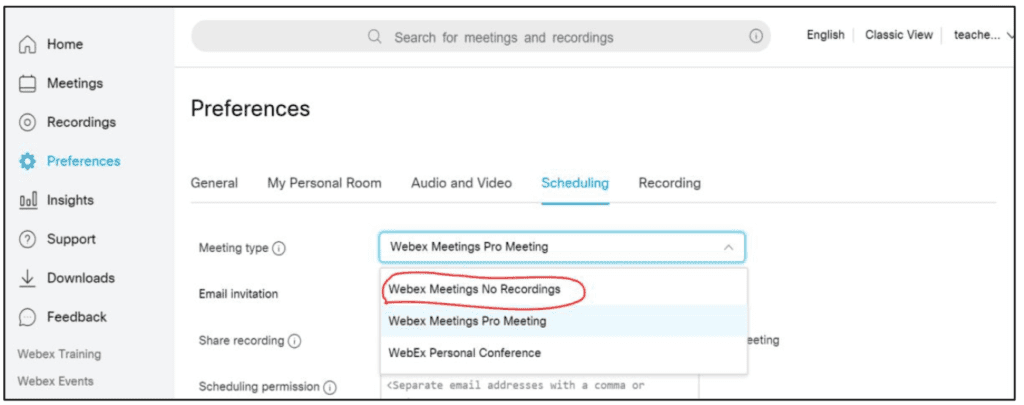
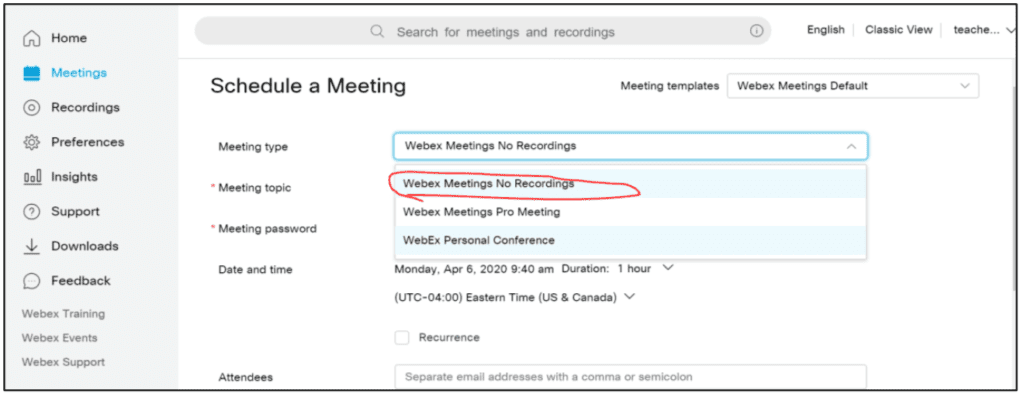
Next select the “Scheduling” tab. Under “Meeting type” select “Webex Meeting No Recordings”. Please note that by default the platform is set to record sessions which will automatically start recording. This will take up valuable space on the platform.
-
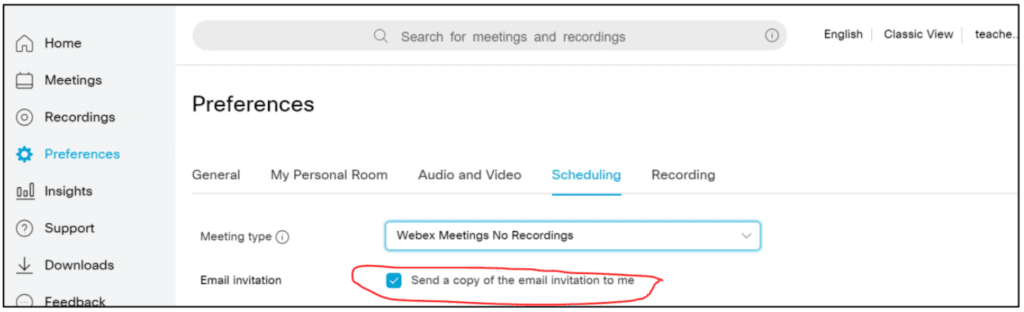
Under Email invitation check the “Send a copy of the email invitation to me” check box. Click the blue SAVE button.
Creating A Scheduled Meeting On The District’s Webex Portal.
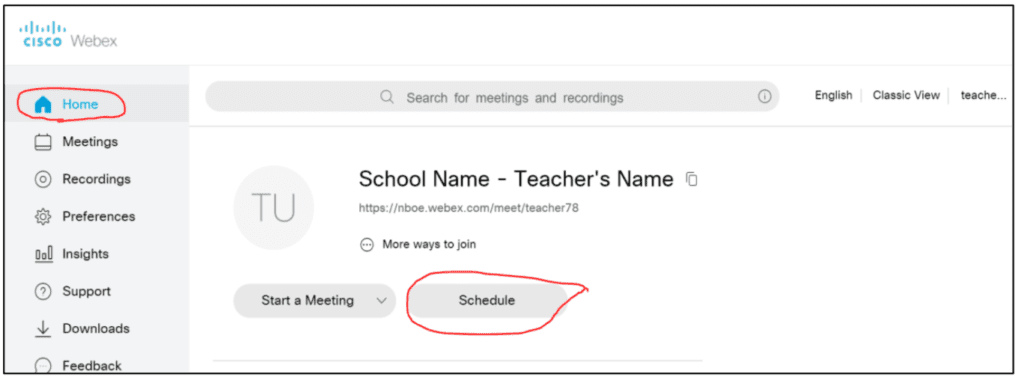
- To create a schedule meeting click the “Home” menu item and click the gray “Schedule” button.
- Change the “Meeting type” option to “Webex Meeting No Recordings”. By default it is set to record sessions which will take up space if not managed properly. See the section on recording later in the document.
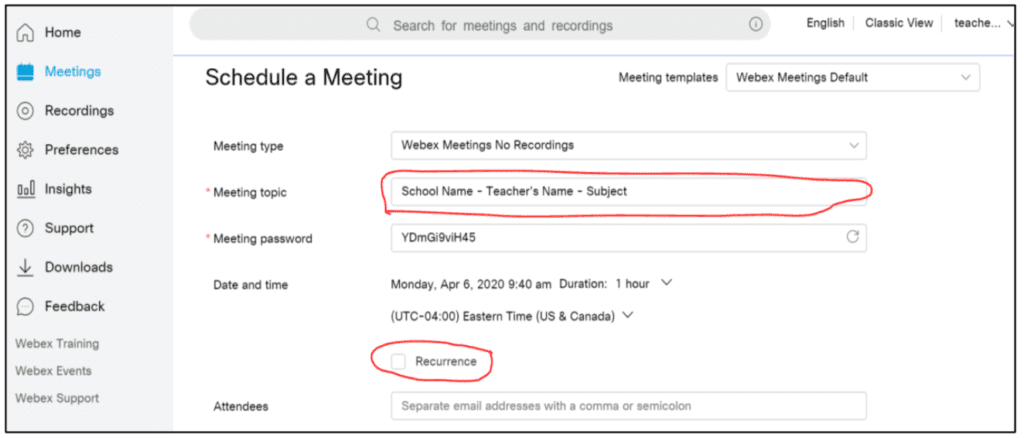
- Add a descriptive statement that describes the classroom session under “Meetings Topic”. If you need the session to occur daily, weekly, etc. you will need to choose Date and Time for the meeting and also check the Recurrence option as shown. By default the platform is set to start the meeting immediately.
- If you like the meeting to occur immediately, you will just need to click on the Start button instead of the Schedule button. The meeting will launch and start right away. If a scheduled time is selected a Schedule button will appear and when you click on it, it will save and schedule your meeting.
- Scheduled meetings will appear under the “Meeting” menu item. To start the meeting click on the green “Start” button. To get meeting information such as a meeting code, password and link, click on the listed meeting.

- If you wish to copy the meeting information to platforms such as Google Classroom so students can access it, you may click on the meeting instance, use the copy icon on top right corner of the screen and then paste it a Google Classroom or any other platform of your choice. (see picture below).
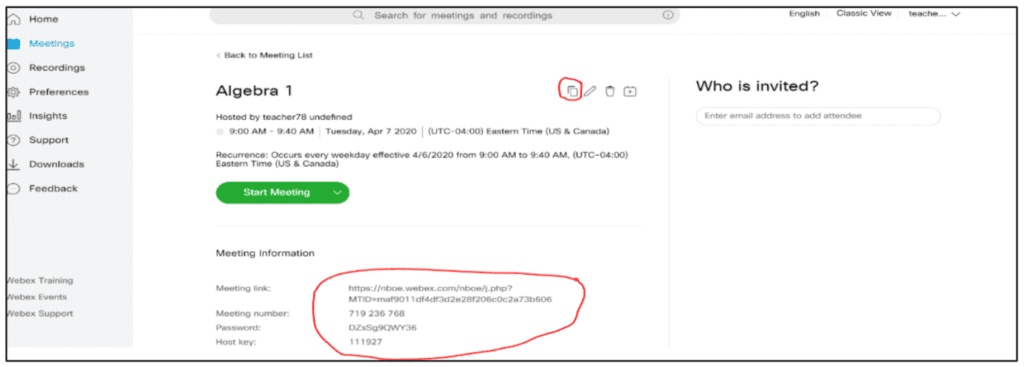
- Each meeting will have a unique meeting code, password and link that will last for the duration of the meeting. If the meeting is a scheduled recurring meeting, the meeting link, meeting code and meeting password will remain the same until the meeting is deleted or the meeting reaches the scheduled end date.